Just as a reminder, it's okay to post responses to prompts from previous weeks even if new prompts are already up. So if you have tried anything inspired by older prompts, please feel free to still post! Also, if you have any suggestions for drawing exercises and prompts, or comments/feedback on the ones I posted, please comment.
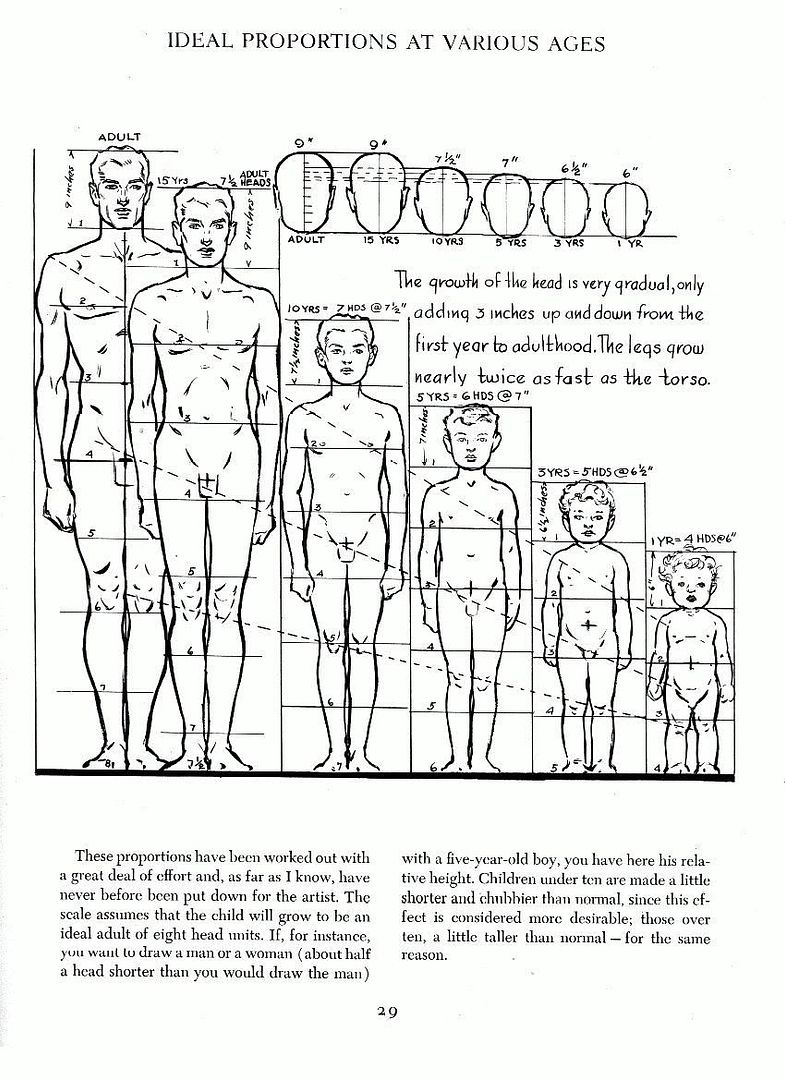
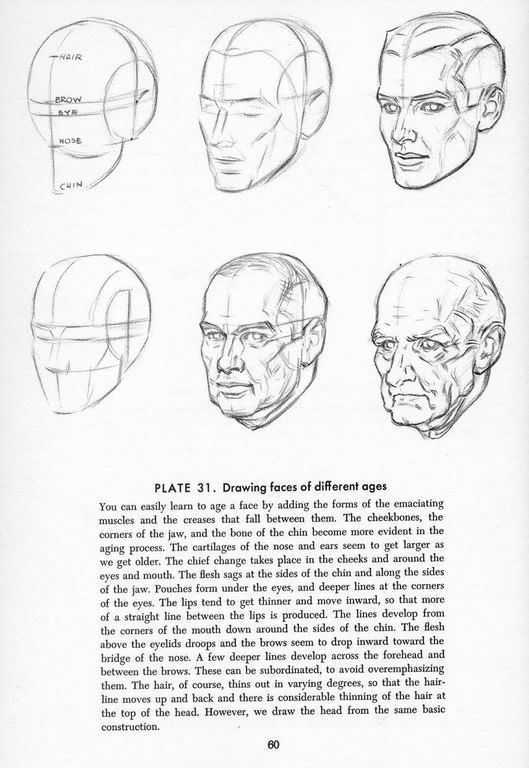
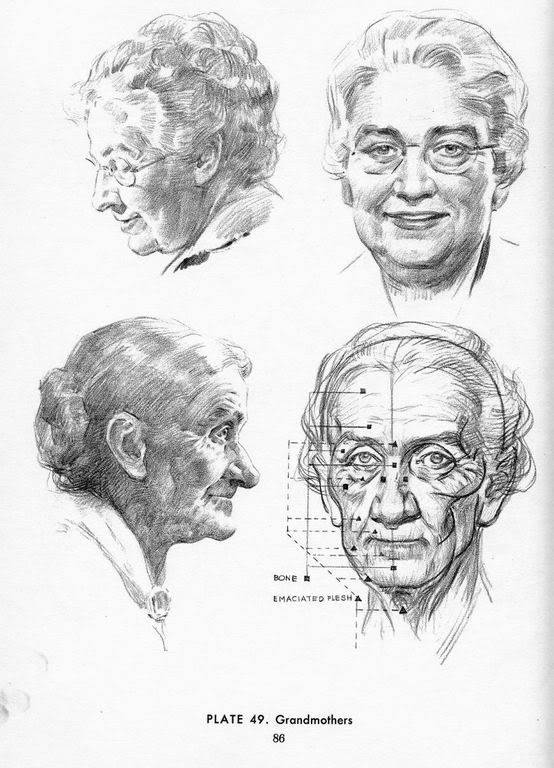
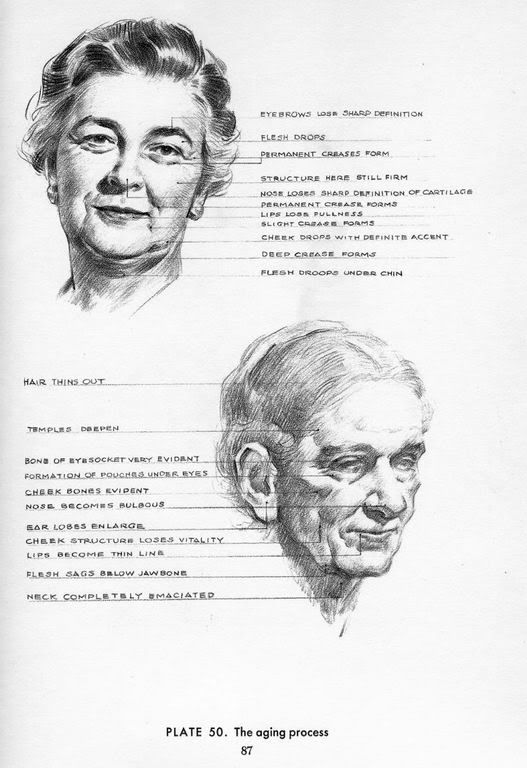
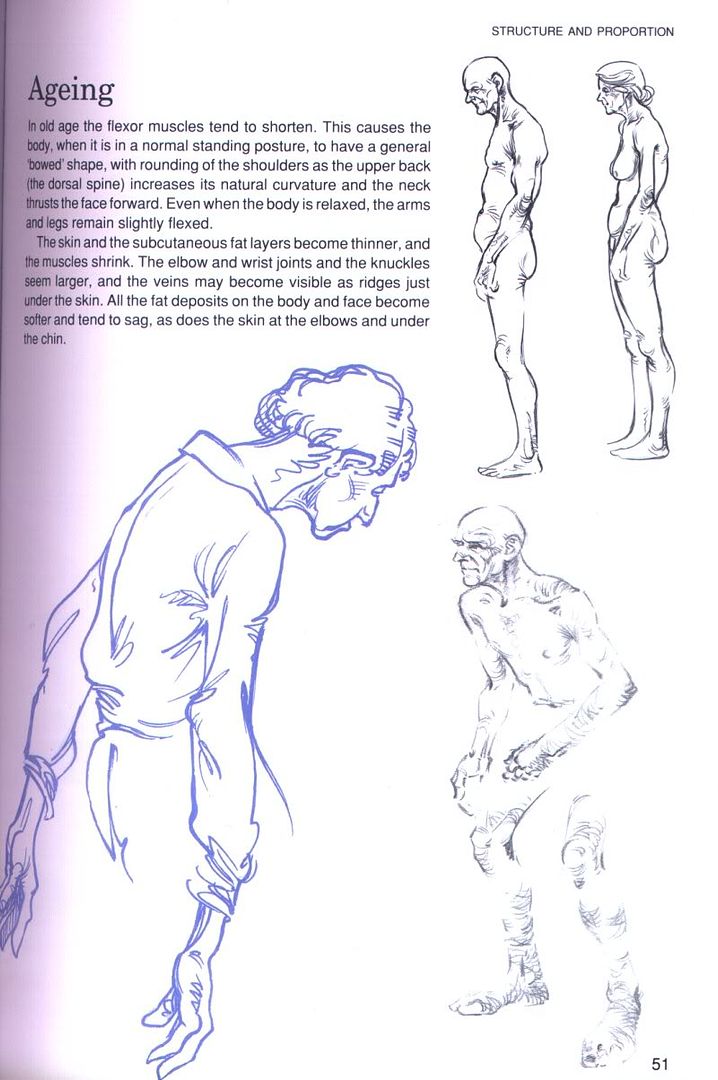
1. Drawing humans of different ages. Draw humans of different ages (children, teenagers, adults, old people) to practice the different proportions and the signs of aging. For a more difficult challenge you can create specific characters, and draw them at different stages of their life. If you have problems aging a specific face, maybe photos of yourself or your family (or even famous people without plastic surgeons) can help.
For a general idea how to draw different ages most how to draw books covering humans have sections on age, like these pages from Andrew Loomis' books "Figure Drawing For All It's Worth" and "Drawing The Head and Hands" (
p. 29 /
p. 60 /
p.86 /
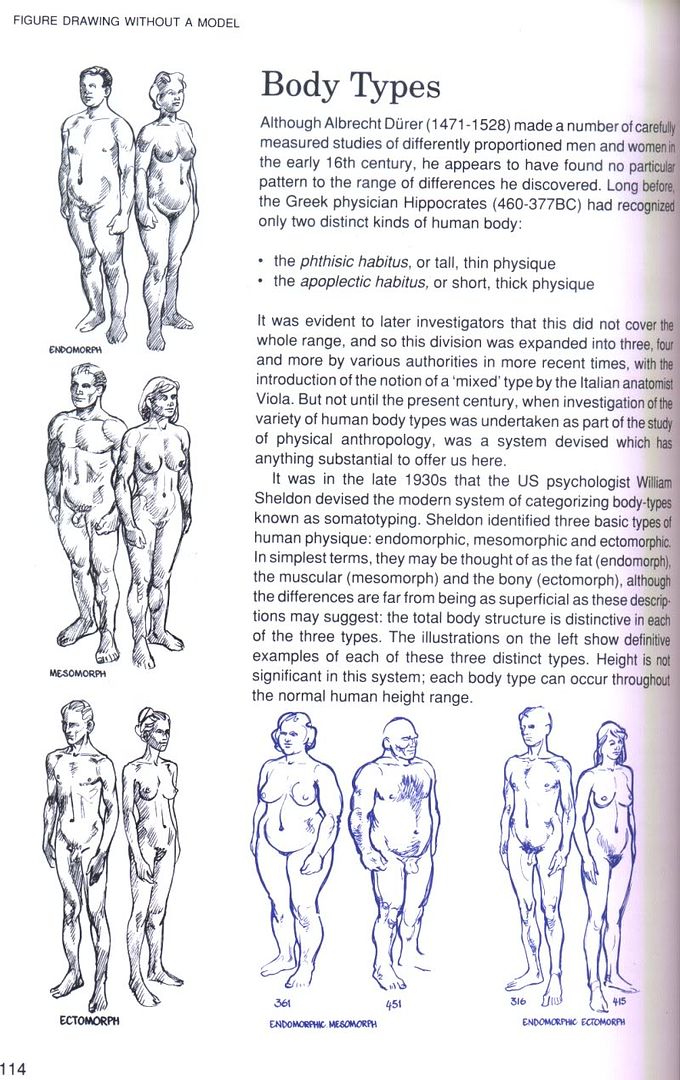
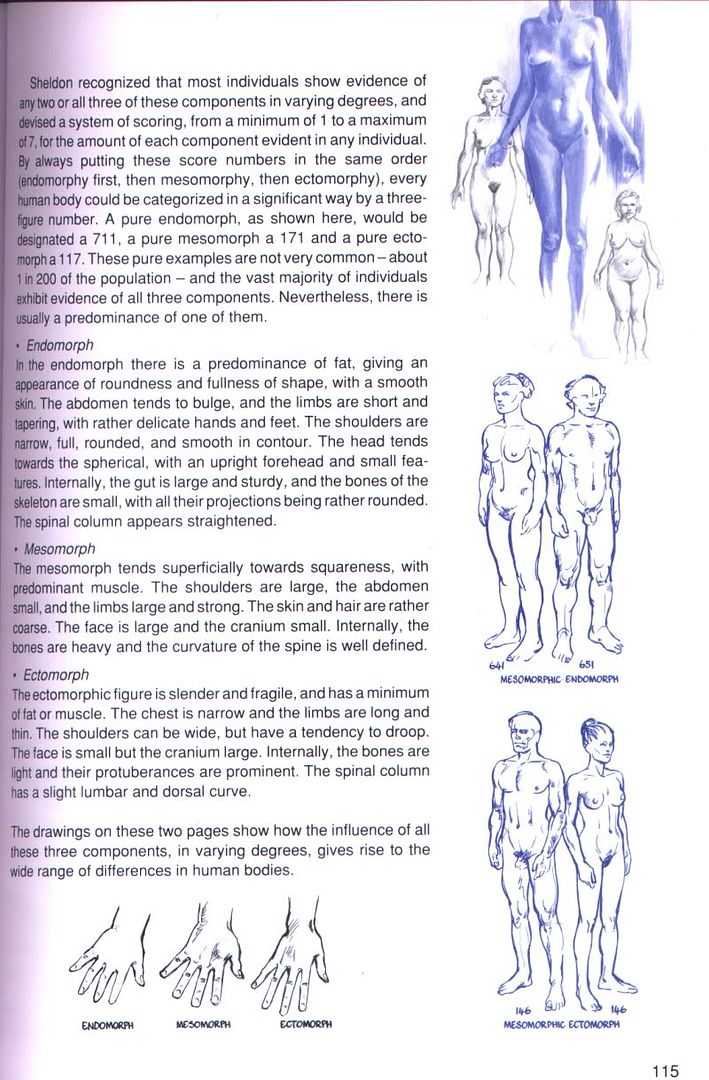
p. 87), and these from "Figure Drawing Without a Model" by Ron Tiner (
p. 50 /
p. 51), though obviously the complete sections go into more detail.
2. Combining expressions and body language. In the previous two weeks there were prompts to practice expressions and body language, now this week's prompt brings both together. This is another exercise from
Scott McCloud's comic Making Comics, taken from page 127:
Try a one page sequence of a person holding a phone to their ear, speaking only occasionally, making short unspecific answers or comments on what the unseen speaker is telling them ("I see," "uh-huh," "no, of course," etc...). See if you can communicate how the other caller is affecting them emotionally, through their changes of expression and body language alone.
Extra challenge: Can you then take the exact same dialogue and redraw the conversation to a´have a completely different emotional meaning?
3. Practicing perspective. This is an exercise to create and use perspective grids (a grid of guidelines indicating the horizon and the vanishing points) from McCloud's book, page 183:
Take a photo of an object with a fairly complicated shape and a lot of parallel edges or right angles (a car, a lawn mower, a coffee maker, a fire hydrant). Make sure your viewing angle isn't straight on but from an odd angle, so that you can see two sides of it and its top or bottom. Then trace that photo into a small section of a large panel and use it to infer a perspective grid. Using the grid, draw an invented scene around it. Then improvise one or two new panels, including the same object, but using a new grid of your choosing to show it from a different angles.
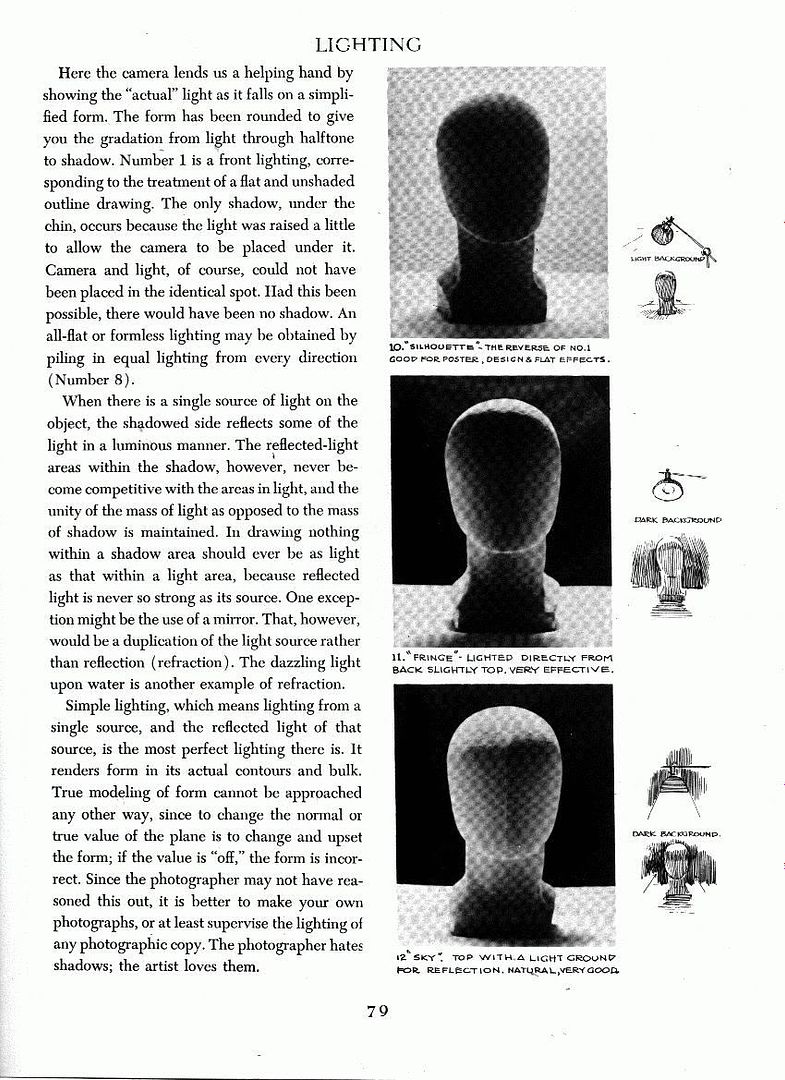
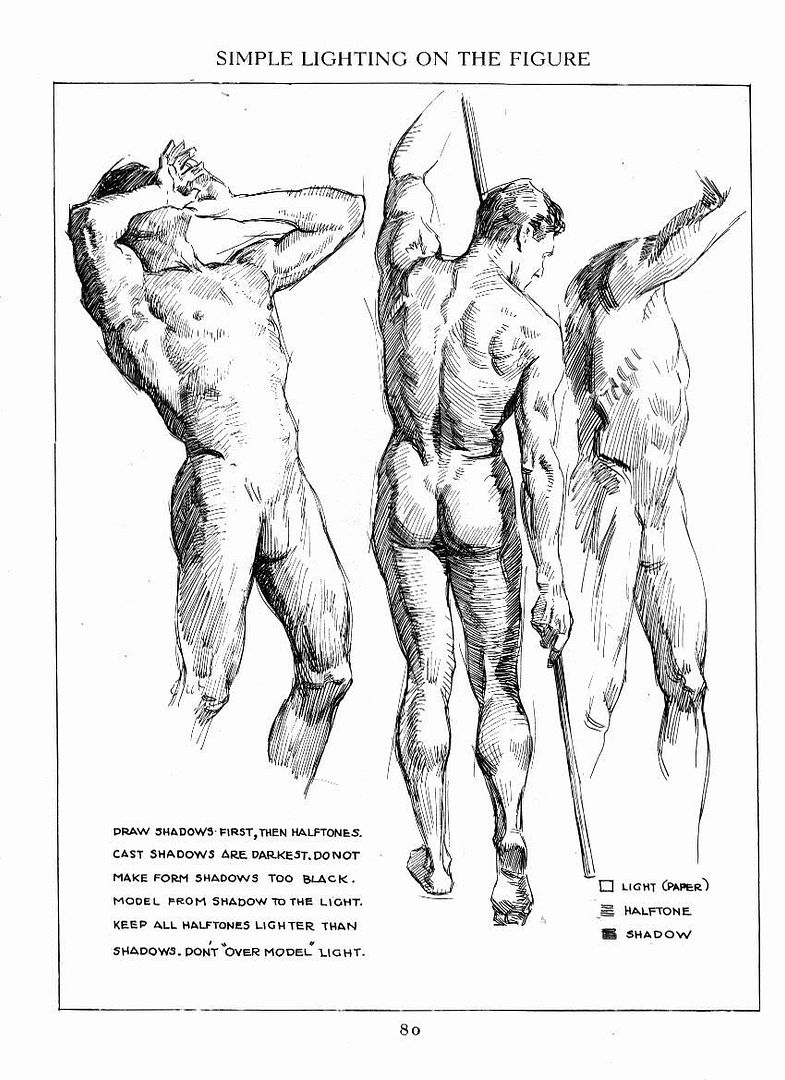
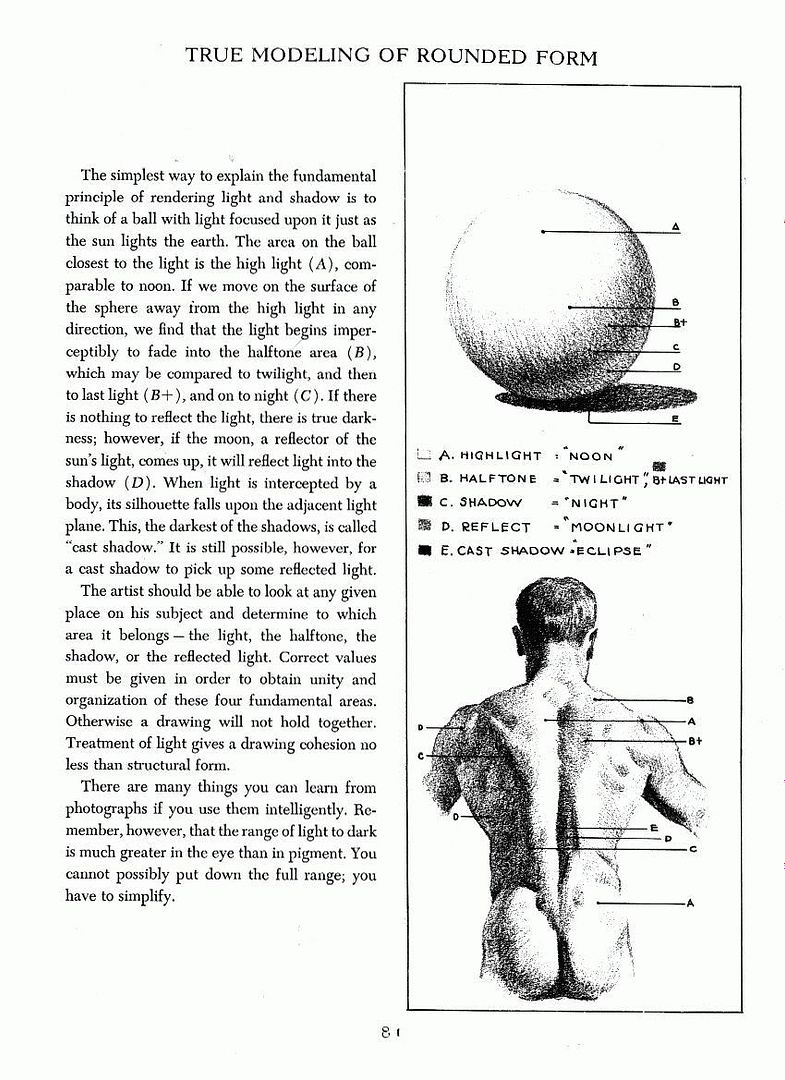
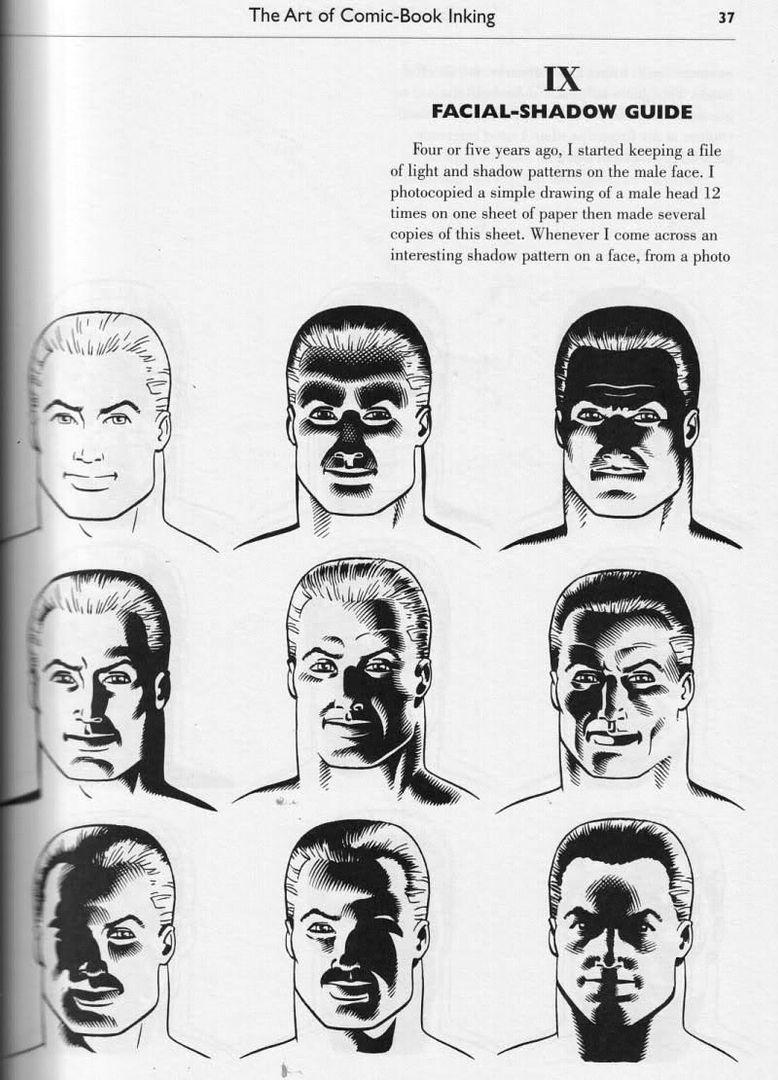
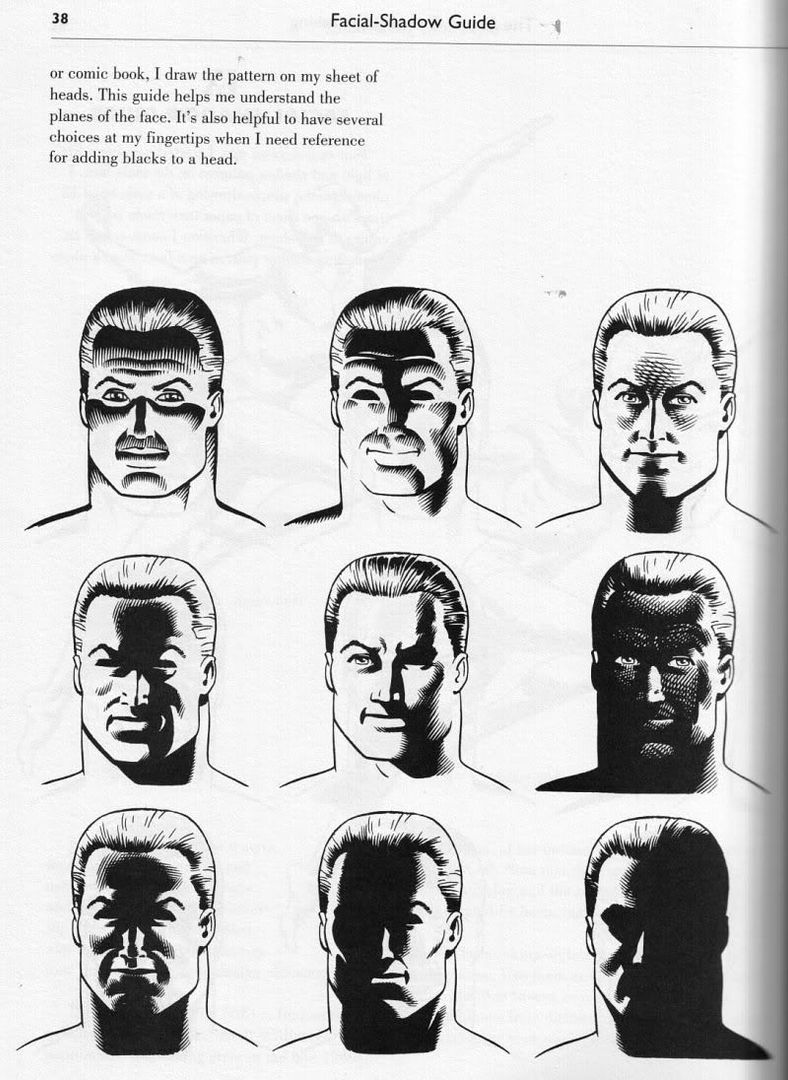
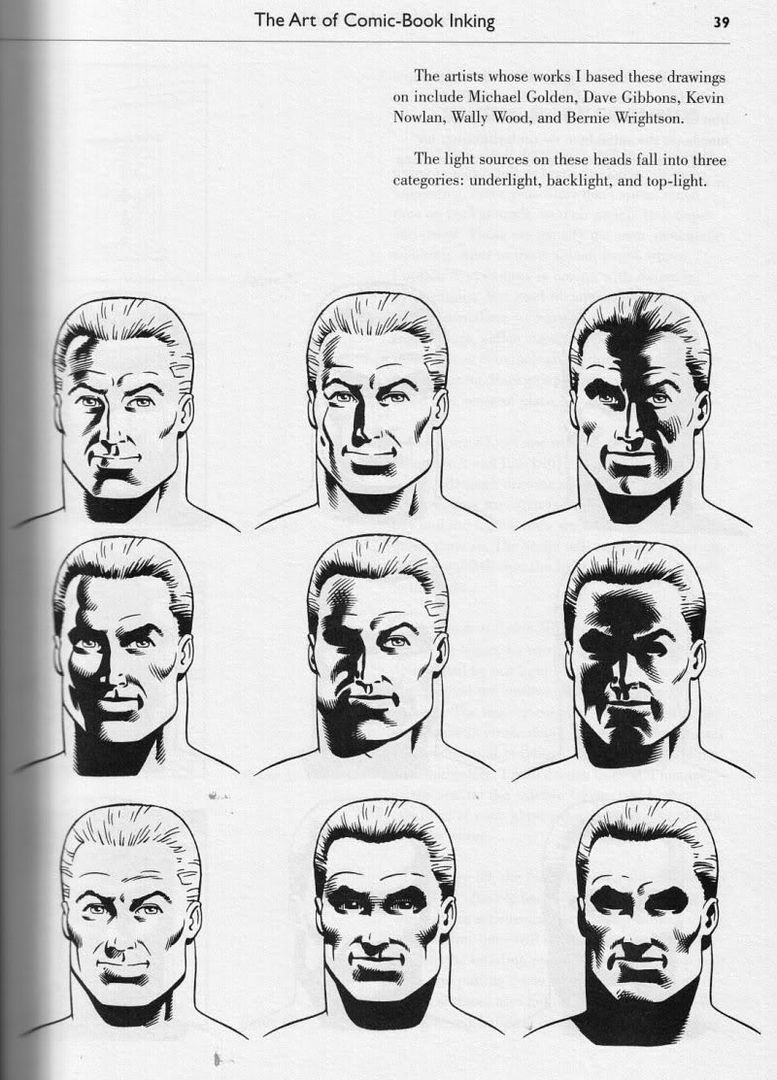
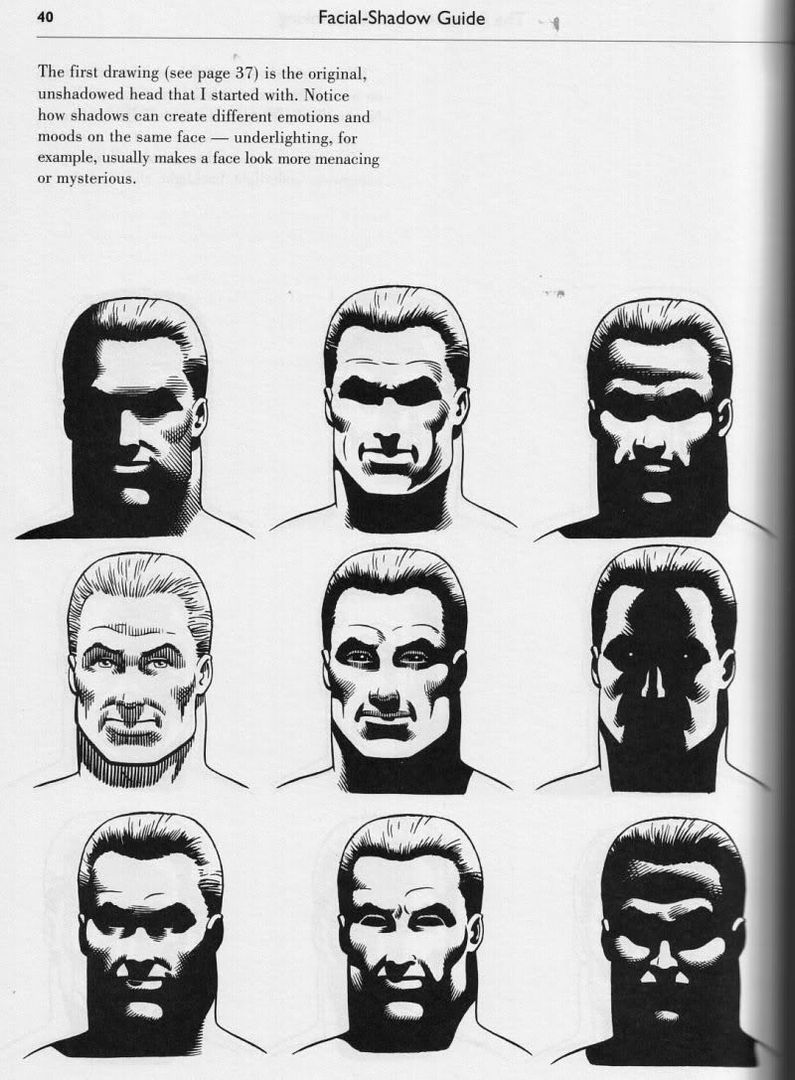
4. Experimenting with lighting for different moods. Draw something (a scene, or some objects, or a face, whatever) and then illuminate the same motif in different ways. How does different lighting, i.e. more or fewer light sources, different kinds of light (like diffuse or discrete sources), quality of light (artificial, daylight, candle light....), and different directions of lighting (from above, below, behind etc) change the motif and its emotional impact? You could do a whole series of experiments changing the variables or just a few. Obviously with color the options are more varied, but you can also vary your light just with b/w for simplicity and fewer options.
Unfortunately the only example for systematic lighting changes I have on hand are various guides to facial shadows and rendering such, but these kind of illustrate that the mood changes, and to have these as reference is handy for other things too, so I included these as example. One set from Loomis' books (
p. 78 /
p. 79 /
p. 80 /
p. 81), another one from Gary Martin's "Comic Book Inking" (
p. 37 /
p. 38 /
p. 39 /
p. 40).
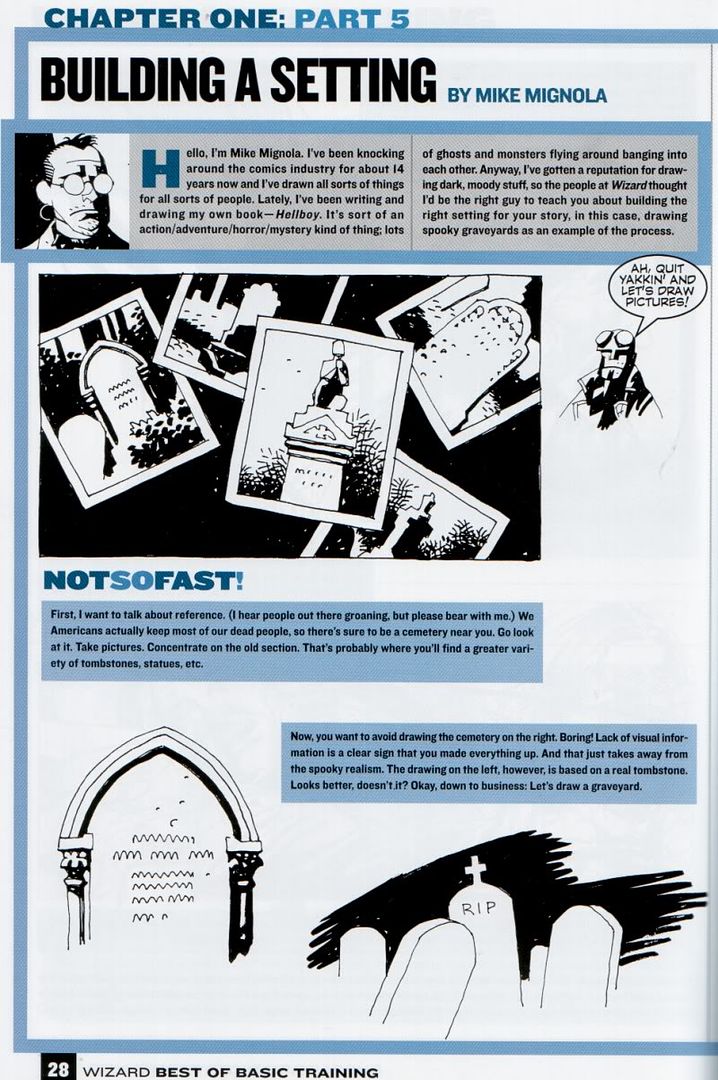
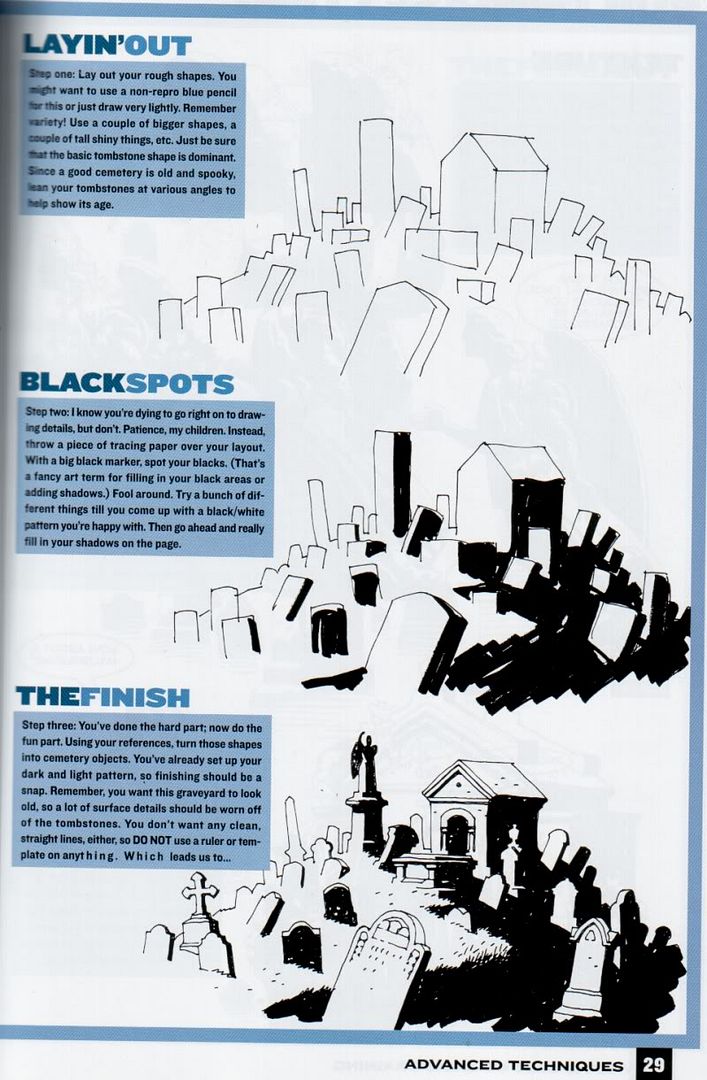
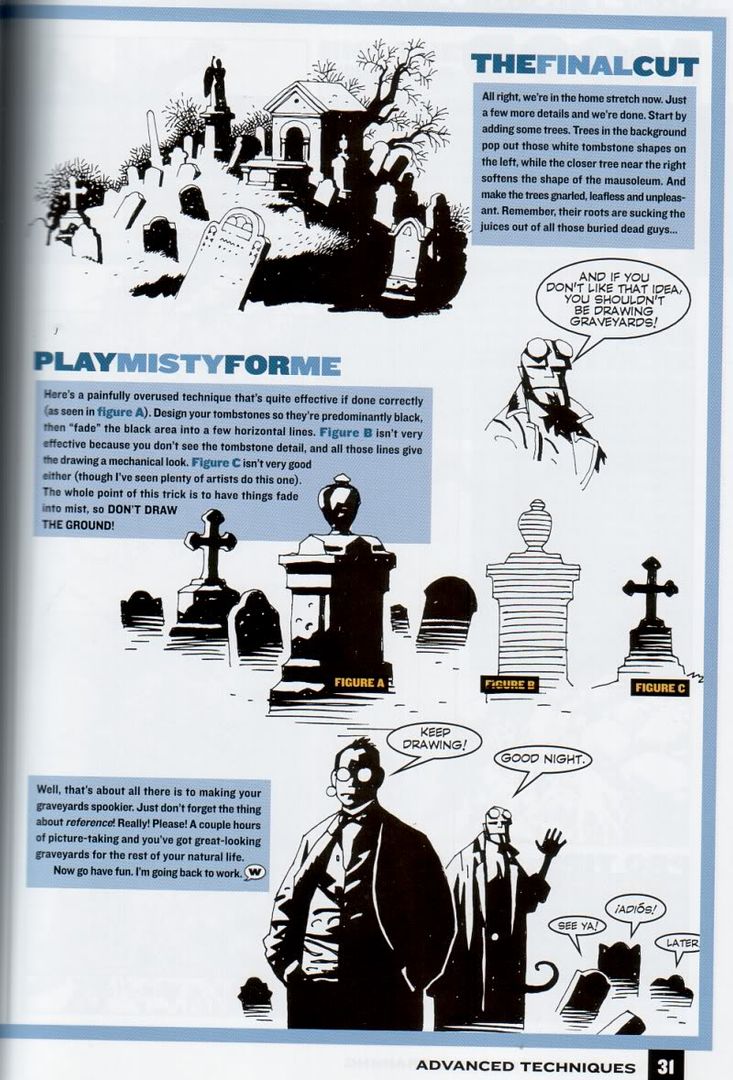
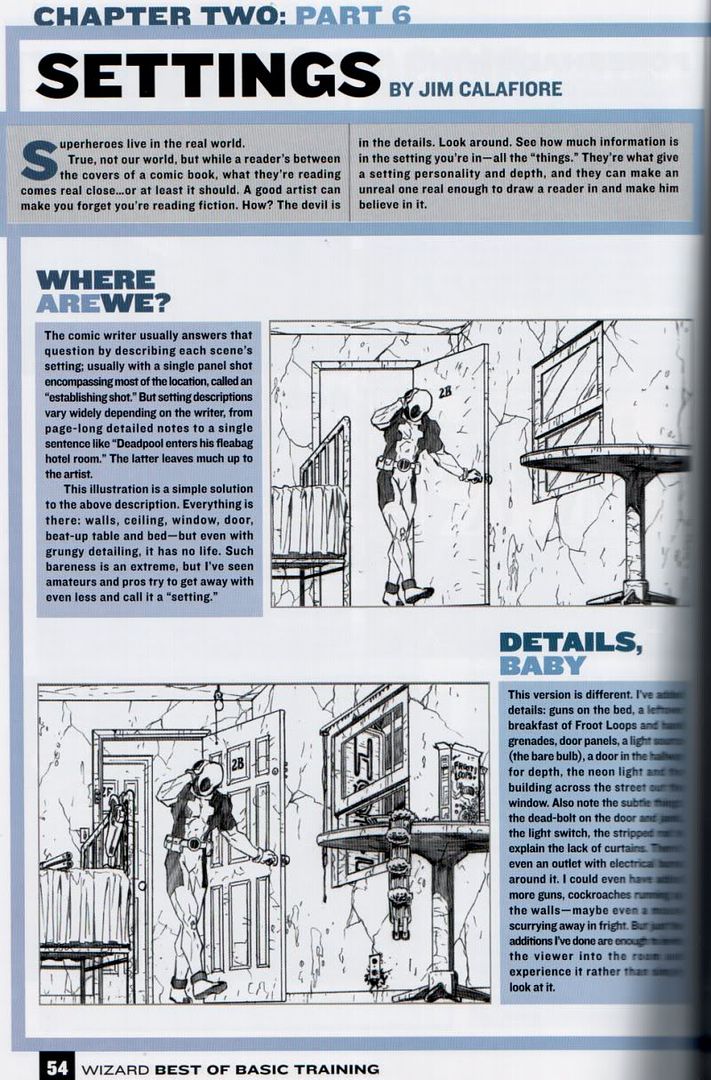
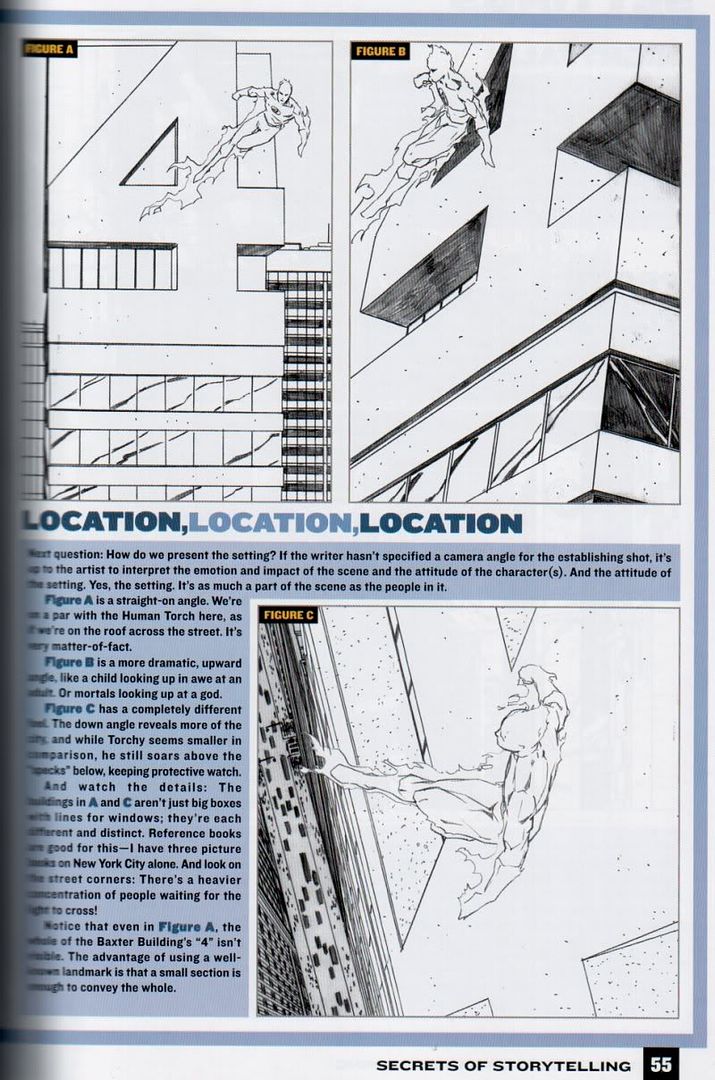
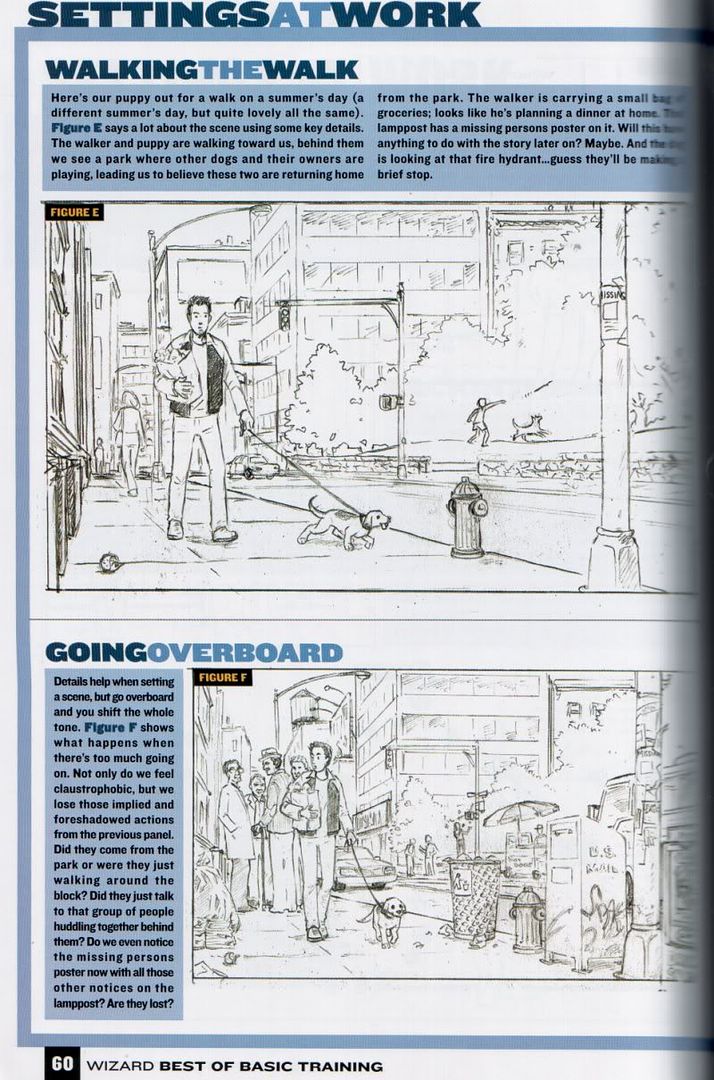
5. Drawing background detail.It can be tricky to decide how much detail to include in a background. Too little detail, and the background looks flat and generic, too much detail and it overwhelms the main motif and detracts the attention like a "Where's Waldo?" crowd. (See this excerpt from a chapter of "Wizard How To Draw: Storytelling" on background detail for further illustration of this effect:
p. 54,
p. 55,
p. 60.) Vary the level of detail for a background of your choice, and observe the effects the different level of detail in the background have.