
| rusty kuhnts ( @ 2009-07-10 20:11:00 |
|
|
|||
|
|
|
|
|
|
|
- Definitely not your standard character table
- Mainly for CDJ connoisseur types, who value form with their function
- Moderate understanding of HTML recommended
- View in use here
The concept of this table was inspired by this entry in
This character layout is more complicated than the average table because it is actually a series of individual tables that link to one another, but because of the div tag, only one is visible at a time. I'll explain how to modify it as best I can, if it's still super confusing, please let me know where I lost you when asking for help. Bonus points if you include your code in a textarea box or a link to the entry where you have it posted.
1. Start with the following bit of code to set up an LJ cut and start the div:
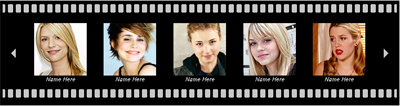
2. Think of this layout as an old school slide show; in each slide there are five characters, when you click an arrow to go forward or backward, you're moving on to a different slide. The code below is the code for ONE slide.
Every slide needs to be preceded by an anchor tag, to identify it. Each of these anchor tags needs it's own unique name - I tend to name them "one", "two", "three", etc., because it's easy to remember, simple, and logical, but they can be named anything you like as long as no two frames are named the same.
Within each frame is a table, within each table there's an img tag with alt text labeled "back" and another labeled "forward". These images are the arrows, and they are linked to the previous and next slides using the pound sign and the name on the anchor tag, i.e. a href="#one".
To summarize:
- NAME your anchor tag for the slide.
- Make sure the "back" arrow image links to the anchor tag for the PREVIOUS slide (or in the case of the first slide you can link to nothing, to itself, to another page, or to create a somewhat circuitous effect, to the LAST slide).
- Make sure the "forward" arrow image links to the anchor tag for the NEXT slide.
- Move One Character At A Time: Every character shifts one space to the left each time you click the forward arrow. This is probably the smoothest effect, and it's the one I've chosen to use in the example link above, but it requires the most slides and the most clicks. To achieve it, I recommend copying the previous slide and pasting it, then copy just the table cell that contains the info for the FIRST character of that frame before deleting it. Paste that table cell beneath the LAST character's, and modify the img src tag and the text to suit a NEW character. Repeat this whole process as many times as needed. Obviously, if you're someone who has forty previously played characters, this is going to be a pain because it requires a LOT of copying, pasting, and editing. So consider this...
- Move Five Characters At A Time: Each click on the forward arrow takes you a full five characters forward. Because each slide has five new characters, there are drastically fewer slides, so there's a lot less copying, pasting and editing. Paste a slide, name it, modify ALL of the img tags and text for each of the characters, repeat as needed. This can feel a bit disjointed for some people, especially if you only have a dozen or so characters, so I'll mention a middle ground option...
- Move Two Characters At A Time: For anyone who's ever visited a Coppermine hosted photo gallery this might feel familiar (example). There are five images, if you click the forward arrow, the character on the right becomes the character in the center, the character in the center becomes the character on the left. To achieve this effect, copy the previous frame, paste it, find the table cells containing the first TWO characters' icons and text, copy them, and delete them. Below the table cell for the LAST character, paste the table cells for the first two, and edit the img tags and text to suit two NEW characters.
4. Once you've set up, edited, and linked all your slides together, finish off the entry with this:
And you're finished!