
| kathelyne ( @ 2008-03-21 14:14:00 |
|
|
|||
|
|
|
|
|
|
|
| Entry tags: | 15th century, clothing, dress diary, gamurra, in progress, italian, renaissance |
Dress Diary- Brown Florentine Gamurra 1474-80
This is my dress diary to date for my latest dress
18/2
Starting a new dress…
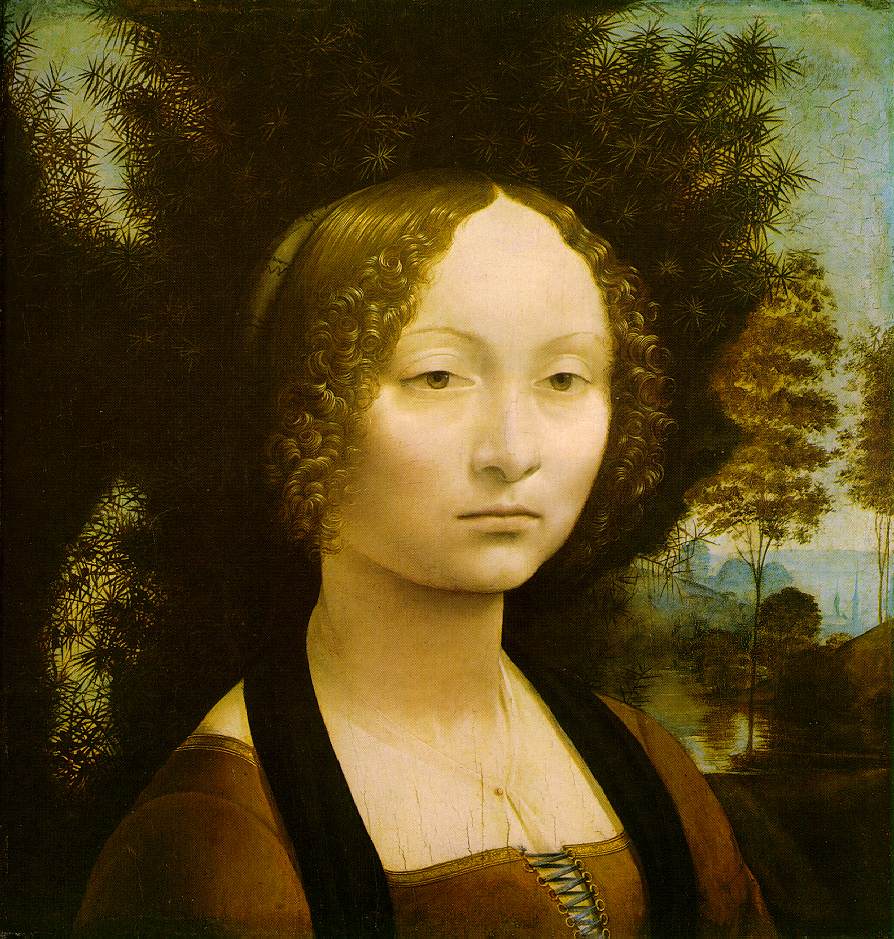
So my new re-enactment group have officially selected a date of 1480, with a research period of 1470-85, rather than ten years earlier (there’s not much change, just a whole lot more research available for the ladies) which means I can now use one of my favourite portraits as my main source of research, as it is smack bang in the middle of the period, not right at the end or after. This is the portrait:
http://www.ibiblio.org/wm/paint/auth/vi
It is of Ginevra de' Benci who was a Florentine (ie, from Florence in Italy) noble woman, she was married in 1474 when she was 16. I have seen this painting dated at 1475, 1464-76, 1478-1480, 1476, 1474-78 etc, but you get the point, in the latter half of the 1470s, or sometime between 1474 and 1480. No matter what the date, it is perfect for our new time period! Yay!
It was painted by Leonardo da Vinci, you may have heard of him ;)
I started cutting the dress out the other weekend, the original plan was to have four panels 1 metre wide and 120cms long (the fabric width) and use the half metre left over for bodice and sleeves (I had 4.5 metres). The panels would be cut into eight gores and attached bias edge to straight and box pleated.
Then I measured my fabric, and it was 150cm wide- too long for a skirt, and I didn’t want to just cut 30cm off the hem, as a 4metre by 30cm strip of fabric isn’t useful for much except pouches… and that’s a lot of pouches!
So I decided to cut panels 120 cm long, and use the width of the material as the width of the fabric. Of course, 4x1 metre goes into 4 metres far better than four 1.2 metre lengths! So I thought I would just make three panels and gore them to have six gores. Of course, the material wasn’t the sort that ripped!!! The huge t-square wasn’t where it lived, so I wasted a good 30cm of fabric trying to get a straight edge, until dad got the t-square from the old tv-box in the garage (NOT where it should have been). Now, I realised I wouldn’t QUITE have enough for the third panel, and I couldn’t cut it shorter, and I didn’t want to not have sleeves. So I worked out that with the two panels I had 3 metres width of fabric (1.5+1.5 remember). I got my calculator and multiplied my underbust measurement by three, and ended up with 216, so if I were going to box pleat straight panels I would need almost a metre less than I had cut, wasting not only HEAPS of one panel, but almost another whole panel I had left in the material! So I multiplied it by five, and got 360. If I cut a third panel 60cm long, then took 30 cm off the end to make it 60 wide by 120 long, I could have enough to do stacked box pleats, and enough left for sleeves and ONE pouch!
So this dress now has two straight panels 150cm wide and one panel that is 60 cm wide, that pleat down to 30cm, 30cm and 12cm which make 72cm of pleated skirt at the ‘waist’- just right! In reality the 60 cm panel will be cut 66cm, because the measurements don’t include seam allowance, and so the extra on this one will make up for the fact that I loose just under 2cm of fabric in each panel, and that I want the skirt to be slightly longer than 72cm so it can meet up and overlap slightly in the front rather than just stopping at the edges of the bodice, as there is a gap in the lacing.
I then pleated one panel, remembered just as I finished I hadn’t hemmed it first, unpleated, hemmed the top, pleated it again, sewed the pleats down with a whip stitch along the top (which halved the thickness by compressing and holding things in place, and was smoother than the pins) and as I went I did a few stitches down the front of each pleat as an experiment- I like how that looks. I then hemmed one side, and hemmed half of the other side on the bus. For all this I used silk thread.
I didn’t get much more sewing done, as I had a museum display to finish for the new museum exhibit- and it was all a rush- it was finally all finished 30 seconds before the first people arrived for the opening on Friday night! Yes, really, We had just stuck a last sign up and had just picked up the paper from the double sided sticky-tape, and it was in my hand when we heard voices just outside asking if the mueum was open or not. We heard a “not quite” and yelled back “yes”.
On Saturday afternoon (day after the opening!) I sat down in front of the tv and the real version of Pride and prejudice- the BBC version.
I make my bodices by cutting a lining the same size as the finished bodice piece (ie, without seam allowance) and the fashion fabric bigger. I then fold the outside fabric over the lining, and stitch it down. This time I used silk thread. Then, using synthetic thread I used tiny whipstitches to attach the pieces together. This time I tried not clipping the seam allowance, except for the neckline as I heard it was possible to do with this technique and made the seams stronger. It works fine.
So this is what I did, by the time the first disk was over, I had finished one front piece and one back, and sewn them together at the side and the top. I had also started on the other back piece, and it was half finished, and half sewn to the other back piece.
On Sunday I had a meeting with my re-enactment group and I almost finished the bodice there, then I came home and put the last few lacing rings on, and started hemming the bottom edge which I finished today. I have now started hemming another panel ready to pleat, but in the mean time took photos with the bodice on with the panel I have done pinned to the front to give the look. I won't wear a panel like this. The two big panels will each start with one edge at the front centre, and going round to the back, and the small panel will cover my butt (which is feeling very exposed in this photo!)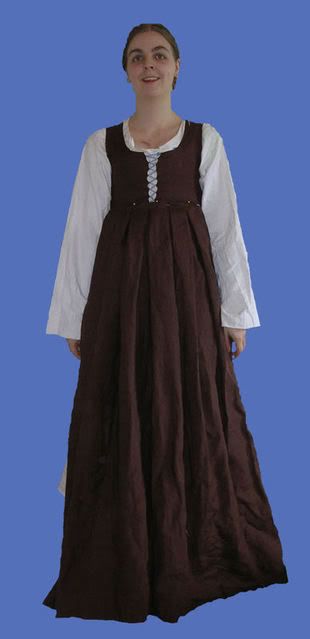
After the panels, I have the sleeves to do, and I also have to attach my trim, which looks like red and gold finger loop braid, but isn’t really- just cheap trim.
The sleeves will be brown and partially sewn in (This is a working dress, as in I will be cooking and lifting and so on in it, and I like the partially sewn in look!) However if I find I am sewing them on, taking them off and re-sewing them on too much (due to heat where I live, we only have to wear two layers of sleeves, so when I wear an overdress with sleeves I will remove the sleeves of the dress underneath), then I will just point them on or something.
This dress is entirely hand sewn, all visible sewing is done in silk thread, all unseen sewing is just done in synthetic thread, I would have used all silk if I had enough. Please excuse the dorky hair and bad photos as usual. Later this year my group are getting some proper photos done outside, so I will have nice photos and not ones in my messy bedroom taken with the camera’s timer!
10/03
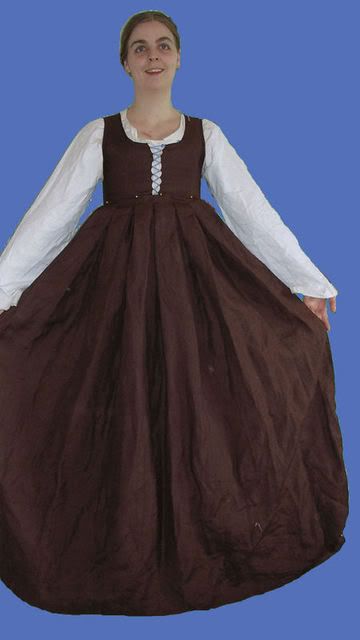
Since I last posted I haven’t done much- but I have new shiny photos.
I have pleated the second large panel, and sewn both to the bodice. I have also half put some trim round the neckline, and am going to add embroidery to that. I still have the mini panel to peat and attach, and have to sew all the panels together (yes, I should be doing this by sewing all the panels together, pleating them then sewing them to the bodice but I get impaitent to see how it will look), sleeves to do, and to hem the thing. I have to draft an improved sleeve pattern too!
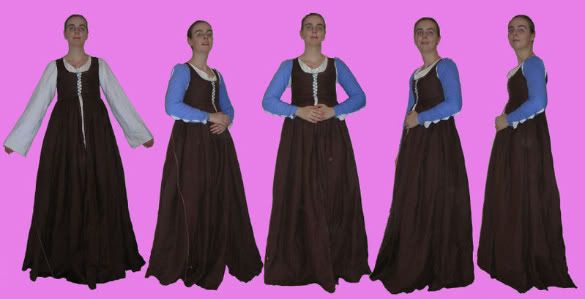
I took some photos with the sleeves from the other dress for fun..
Here is a close up of the trim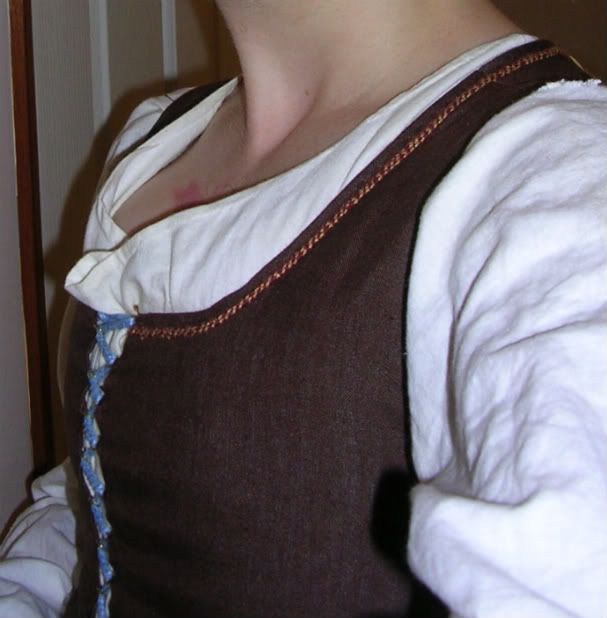
There will also be a line of gold that matches the gold in the trim (well, it doesn't, but I'm stitching the trim on with gold coloured thread, and covering all the gold in the trim with it as I go- so it will match) on either side of the trim.
Here is a view of the back at the moment. The ends of the large panels are not sewn on as they are bring attached to mini-panel. 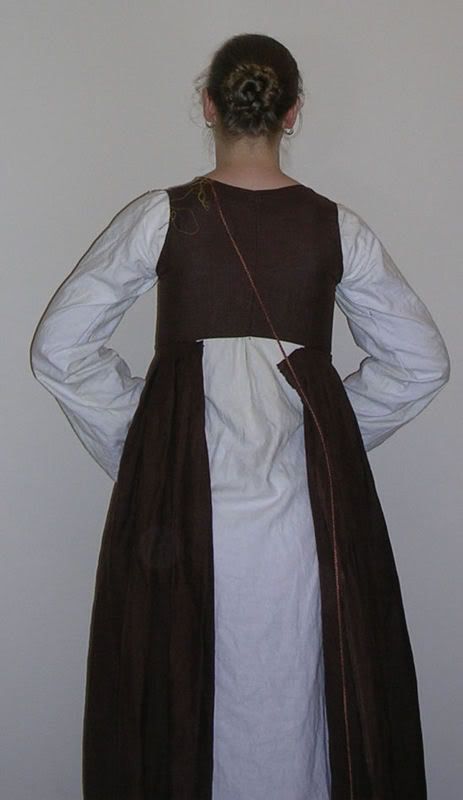
I am debating if I should put a line of the trim (or two even) around the bottom of the skirt, I have over 20 metres of it.
If you want to see a bigger version of the first pic, then you can full view it at my DA http://kathelyne.deviantart.com/art/1474-8
For those that like to download HUGE pics, you can do that there too.
Thanks for reading!