
| kissy kissy killer kitty ( @ 2010-10-15 19:08:00 |
|
|
|||
|
|
|
|
|
|
|
HAIR. Such a tricky thing. Many of us play in fandoms where characters have unusual hair colours--either natural, through mutant powers, or dyed. Or sometimes you just can't find a PB with the right hair colour, so you take another PB with the right face and try to change their hair; this was especially prevalent about 5 years ago when there weren't so many options for redheads. The problem is that if you're not careful, you can end up with two options for your hair colour...  ...yeeeeeeeeeah. When it comes to hair, one of the first things you should do before you even begin is googling the hair colour you're aiming for and study what it looks like naturally, in real life. Dyed hair is pretty vibrant, but it's important to look at the way hair dye fades--even the brightest Manic Panic doesn't look like what you see a lot of people trying to pass off in Photoshop. Red hair doesn't actually tend to be RED so much as an orange-brown; black hair isn't usually BLACK, but a very dark, desaturated brown; blonde hair isn't yellow, it's more of a gold, closer to orange than green. The more you study natural hair, the more you'll be able to see the difference between that and what people often create in Photoshop. There are endless tools you can use to alter colours in Photoshop--there's Colour Balance, Curves, Channel Mixer, Hue/Saturation, Variations, etc etc. Most methods amount to isolating the part you want to change the colour of and utilizing one of those tools. Most of the actual technique lies in recognizing what looks natural and what doesn't. I whipped up these tutorials to give people some simple steps for Photoshopping hair and getting it to look consistent. This is especially aimed at people who want to create unnatural colours like green, pink, etc, the worst offenders I see being Polaris and Tonks. So without further ado... STEP ONE. 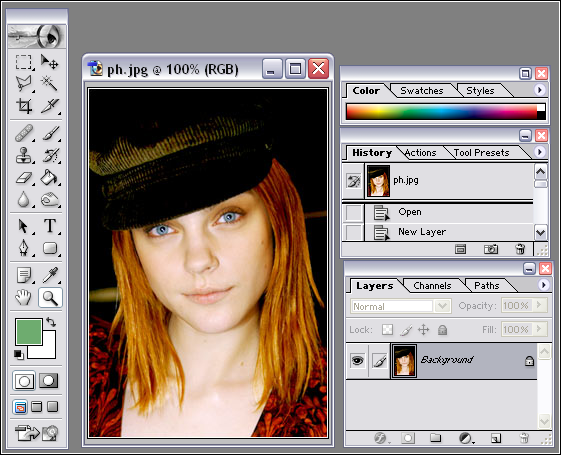 Here is Jessica Stam, being perfect, as usual. Her hair is red, and we want it to be green because for some reason we're using her as Lorna Dane. This is the simplest colour-changing technique that I think most people use, but I also think a lot of people miss a pretty crucial step. Here, we're just setting up our picture in Photoshop. Note the selected colour is a pale bluish-green. I usually pick muted colours; the more saturated your colour, the worse your results are going to be, generally, if what you're going for is a realistic effect. I would also recommend googling the hair colour you want and taking your colour selection directly from an image of a real person with that hair. 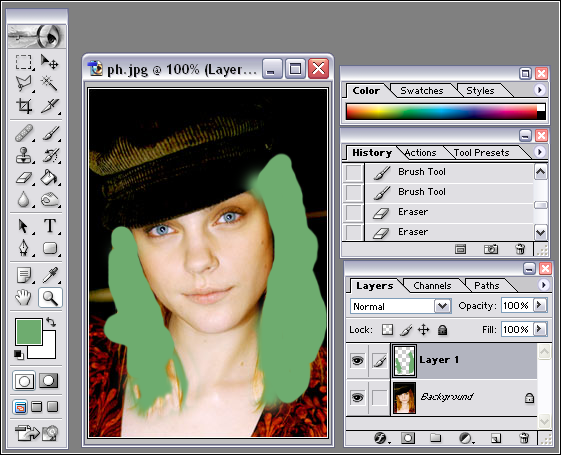 In step two, I made a new layer, and just scribbled all over where her hair appears in this picture. Accuracy isn't terribly important at this stage because you're going to be shrinking the image, but if you want to be more precise, change up your brush settings, both in size and in hardness; for larger "clumps" of hair I use hard, large brushes, and for the smaller strands and flyaways I use much smaller, softer brushes. You can also use the eraser tool with a modified opacity to make the green scribbles more transparent, which will give you a more subtle colour variation. This is great to use if you have a section of hair that has a lot of individual strands that are impossible to trace by themselves and, when shrunken down, are almost indistinguishable from skin--almost. 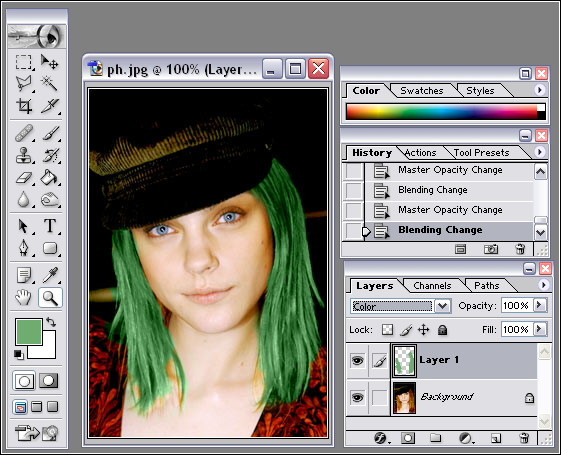 I changed the green layer to Colour. You can also do Hue, which will have a slightly different effect. You can see that I missed some spots when I did the initial STUNNING TRACE JOB; this stage is generally where I go back and clean that shit up, erasing the colour over skin and tracing it over hair that I missed before. 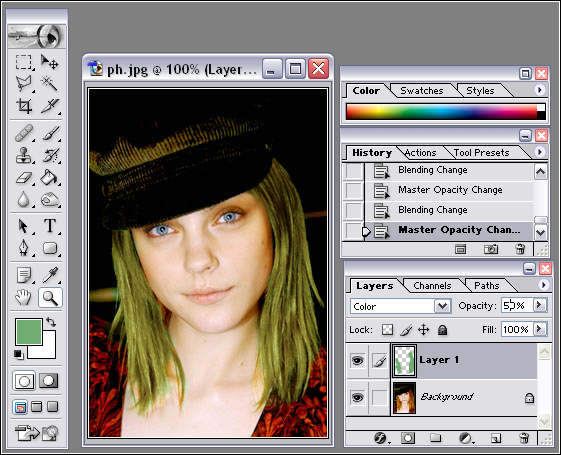 This last step is the one that makes ALL the difference. Change the colour layer's opacity. You can get a great, natural colour effect with only 25% opacity. Here, I went at about 50% opacity. The colour is more subtle and looks natural, like real hair; there's a reason redheads have orangey-red hair and not fire-truck red. (You can also see in this step where I didn't really clean up the outlines very well. I didn't care, primarily because it was a tutorial and also because I was going to shrink this image down to 100x100, where it wouldn't be noticeable.) This method is the quickest and easiest for me, but it's also imprecise and takes a lot of fiddling. It also requires that you remember what colour you used when manipping these--writing down the hex number and saving it somewhere works. If you don't immediately get good results, you can always modify your coloured layer by changing the Colour Balance, Channel Mixer, Curves, or Variations, or preserving the layer's transparency and drawing over it with a new colour. Determining what amount of opacity you need takes practice; eventually you'll be able to see that icons look... a little off if the colour is too vibrant. I would always, always err on the side of caution and go for subtlety. Even dyed hair fades fairly quickly and the difference between Photoshop green hair and Manic Panic green hair can be glaringly obvious.    METHOD TWO. STEP ONE. 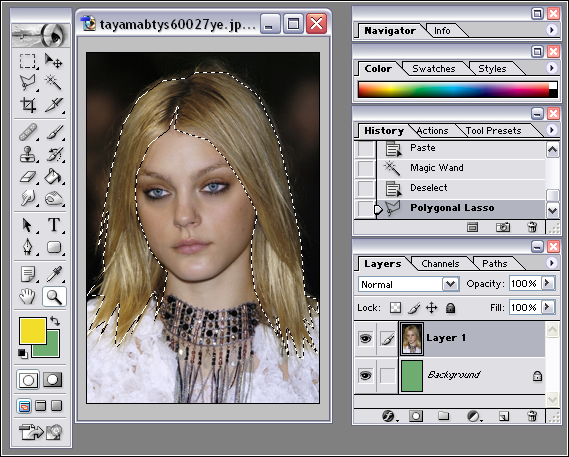 The first step is to isolate the parts of the image you want to change the colour of. You can do this with the lasso tool (here, I used the polygonal lasso because it was easiest; her hair didn't have a lot of flyaways and was short and fairly geometric in form, but you can also use the freehand lasso or the magnetic lasso) or by duplicating the layer and using masks to isolate the hair. Whichever works for you. The most efficient method I've found for hair is a combination of the Magnetic Lasso tool and Quick Mask mode. 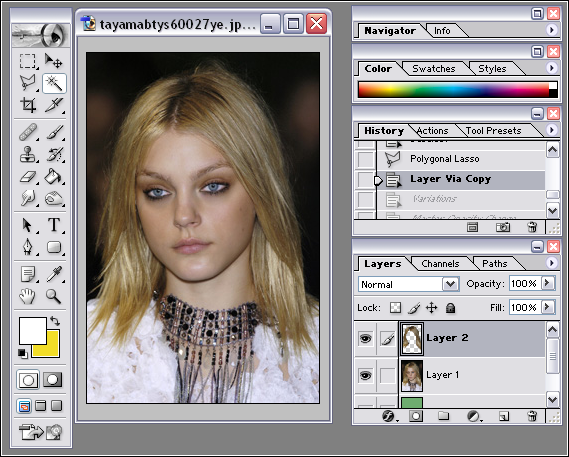 End result: you have the hair on its own layer, with none of her skin or the background. (If you're going for a natural hair colour and not one that's supposed to be dyed, you might want to include the eyebrows in this.) From here, we're going to use a tool called Variations.  This is the Variations screen. You have several options to work with here and it's important to know what each of them does. First of all, you have what part of the image you're going to be targeting: Shadows (the darker parts of the image), Midtones (the medium parts), or Highlights (the lightest parts). You can also use target the image's saturation, bringing certain colours out or making them lighter or darker. The option under that has a slider between Fine and Coarse; since we're doing hair, we want a more subtle effect, so put it one or two closer to Fine for a softer effect. (Coarse obviously has the opposite effect.) There are three options on the right which are pretty self-explanatory; Lighter makes the selection lighter, Darker makes it darker. Then you have a selection of colour options to choose from. Clicking one of them will add more of that colour to your selection. We're gonna go from blonde to red; since lighter redheads tend to have a hair colour closer to orange than true red, I added a couple Reds and Yellows, alternating between them until I was happy with the result. Notice the "Save" button up there. You can either try to remember how many of each colour you added, or you can just save the variation to keep your icons nice and consistent.  This was my result. Not bad, huh? It could probably stand to have a wee bit more yellow (compare it to Stam's red hair in the first step of method one), but especially when shrunk down to icon size it looks like actual red hair looks. The end result was a bit fakey to me, so I lowered the opacity of the hair layer a little bit. I also took this opportunity to colour her eyebrows manually, taking a colour selection from her newly-coloured hair. Notice how the colour on the side there is closer to brown than red? Red hair is actually usually a light brown with a very slight orange-red tinge to it. This is another instance in which the opacity tool is your best friend.  I lucked out here because I ended up being pretty happy with what I got with my first try. Often I will redo the Variations layer several times until I like what I got. 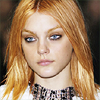 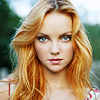 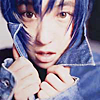 TIPS. - Avoid people with either very dark or very light hair; brunettes work best for characters with unnatural hair colours like green, purple, blue, etc. Go for lighter brunettes. - If you're trying to make a natural redhead, what hair colour you want to go for depends on the type of redhead. A light-haired, orangey redhead usually works best if your base is a blonde; a character with auburn hair will turn out better if the base is a brunette. - For pictures with lots of flyaways and individual strands of hair, what I usually do is go over them with a normal brush and then use an eraser set at 50% opacity. I can get more precision erasing than brushing, generally. |